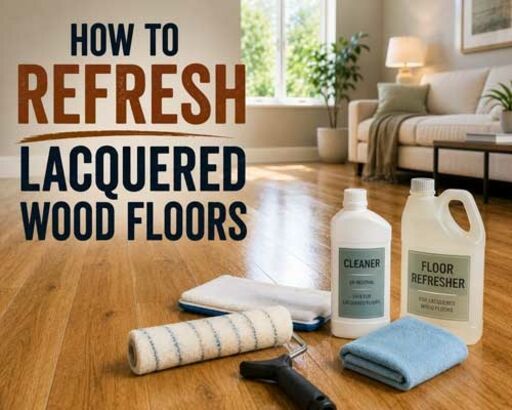
A lacquered wood floor that has lost its sheen but has not yet worn through to bare wood does not necessarily require a full sand and refinish. In many cases, a properly prepared and applied refresh coat can restore the appearance of the floor and extend the life of the existing finish by several years. Understanding when a refresh is appropriate, and how to do it correctly, saves both time and cost.
This guide explains the difference between a floor that can be refreshed and one that genuinely needs a full refinish, covers the process for refreshing a lacquered floor properly, and identifies the products best suited to the job.
Refresh or Full Refinish? A Quick Comparison
| Situation |
Refresh coat |
Full resand |
| Dull sheen, surface scratches, lacquer intact |
Suitable |
Not needed |
| Uneven sheen from wear or inconsistent cleaning |
Suitable |
Not needed |
| UV discolouration of the lacquer |
Suitable |
Not needed |
| Bare wood visible in traffic paths |
Not suitable |
Required |
| Lacquer peeling or flaking |
Not suitable |
Required |
| Deep scratches through to the wood |
Not suitable |
Required |
| Grey or black staining from water damage |
Not suitable |
Required |
| Wax or polish that won't remove |
Risky |
Usually required |
The key test is whether you can see or feel bare wood anywhere on the surface. If the lacquer has worn through in any areas, particularly in the most-used traffic paths, a top coat applied directly over those areas will not adhere properly and will peel.
Preparing the Floor for a Refresh
Preparation is the critical factor that determines whether a refresh coat adheres well or fails. The existing lacquer surface must be cleaned to remove all wax, polish, grease and cleaning product residue. Many commercially available floor polishes and spray cleaners leave a film on the surface that prevents fresh lacquer from bonding. Using the wrong cleaning product in the weeks before a refresh can mean the new coat peels away within days.
The preparation process runs in order:
- Clean thoroughly with a pH-neutral floor cleaner suited to lacquered floors, our cleaners and polishers range covers this.
- Degrease the surface with a sugar soap or dedicated lacquer adhesion promoter, then allow the floor to dry completely.
- Screen the floor with a 120-grit or 150-grit abrasive screen using a buffer machine, or manually with a pole sander on smaller areas, to remove the gloss and create a mechanical key for the fresh coat.
- Vacuum and wipe the floor thoroughly to remove all abraded material before applying the refresh coat.
Any wax or polish residue that cannot be removed by cleaning needs to be physically abraded away, which is what the screening step handles.
Choosing the Refresh Product
A single-component, water-based refresh lacquer designed specifically for recoating existing lacquered floors is the standard choice here. It's applied directly over a properly prepared existing lacquer surface in a single coat and produces a consistent satin finish. It is not a full lacquer system and does not replace the film build of a multi-coat application, but it is very effective for restoring the appearance of a lightly worn floor. Our floor lacquers range includes options suited to this kind of maintenance recoat.
If the existing finish is a two-component lacquer like Bona Traffic HD, applying a fresh coat of the same product (properly mixed) over a screened and cleaned surface can also work well. The important thing is that the existing finish system and the fresh coat must be compatible:
- Same system, same coat: two-component over two-component, or single-component over single-component, generally works well
- Mixed systems: applying a two-component lacquer over a single-component one, or vice versa, can cause adhesion problems
Application
Apply the refresh coat using a high-quality T-bar applicator or a lint-free application pad. Work in sections, moving with the grain direction and maintaining a wet edge to avoid visible lap marks. Apply a single even coat across the whole floor. Avoid going back over areas that have already started to dry, as this will mark the surface.
| Stage |
Timing |
| Foot traffic |
At least 12 hours (water-based) |
| Furniture back in place |
24 to 48 hours |
| Washing the floor |
Avoid for 5 to 7 days |
When Refreshing Is Not Enough
- Bare wood visible in traffic paths: full sanding and refinishing required
- Lacquer peeling or flaking: adhesion failure, full refinish needed
- Deep scratches through to the wood: cannot be covered with a refresh coat
- Grey or black staining in the wood: water damage, requires sanding out
- Wax or polish that cannot be removed: may prevent adhesion of a refresh coat
A well-executed refresh coat on a properly prepared floor looks genuinely good and will not be distinguishable from a full refinish by most people who did not see the floor before. It is a practical and cost-effective maintenance option for floors that are not damaged but have simply lost their appearance. Used as part of a regular maintenance cycle every five to seven years, it can keep a lacquered floor looking well for many decades without requiring a full professional resand.
FAQ
Can I do a refresh coat myself, or does it need a professional? A refresh coat is one of the more DIY-friendly lacquer jobs, since it's a single coat rather than a full multi-coat system. The screening and cleaning prep still needs to be done properly, though, since that's what determines whether the new coat actually bonds.
How do I know if my floor's finish is one-component or two-component before refreshing? If you don't have records from when the floor was originally finished, this can be hard to tell by eye. If you're unsure, it's worth calling us or a professional to check before choosing a refresh product, since mismatching systems can cause adhesion problems.
Will a refresh coat change the sheen of my floor? It can, since refresh products typically come in their own sheen options. If you want to keep the exact existing sheen, check the refresh product's sheen level against what's currently on the floor before applying.
How many times can a floor be refreshed before it needs a full resand? There's no fixed number, it depends on how much film thickness remains and how well each refresh was prepared and applied. Eventually, once the lacquer has worn through in places despite refreshing, a full resand becomes the only option.