 Learning how to lacquer a wood floor is an essential skill for anyone looking to restore or maintain their hardwood surfaces. Floor lacquers provide a durable, protective finish that enhances the natural beauty of wood whilst offering excellent resistance to scratches, spills and daily wear. Unlike other finishes, lacquer creates a hard, glossy surface that showcases the wood grain beautifully and lasts for many years with proper application.
The process requires patience, attention to detail and the right materials. Whether you're refinishing a neglected floor or applying a fresh coat to well-maintained wood, understanding each step ensures professional-quality results that protect your investment.
Preparation: The Foundation for Success
Assessing Your Current Floor
Before you begin applying lacquer, evaluate your existing floor condition. Check for existing finishes, damage or areas requiring special attention. If your floor has an old finish, you'll need to remove it completely to ensure proper adhesion of the new lacquer layer. Use a moisture meter to confirm your wood contains between 6-12% moisture content—essential for successful lacquer application.
Gathering Essential Materials and Tools
Successful lacquering requires specific supplies:
- Blanchon lacquer (water-based or solvent-based, depending on your preferences and ventilation capacity)
- Bona Hard Surface Floor Lacquer for premium finishes
- Orbital floor sander with various grit sandpaper (60, 100, 150 grit)
- Edge sander for corners and tight spaces
- Tack cloth for dust removal
- Foam roller or lambswool applicator pad
- Natural bristle brush for edges
- Safety equipment (dust mask, eye protection, gloves)
- Drop sheets or plastic sheeting
- Ventilation fans or a dehumidifier
Room Preparation
Clear the space completely of furniture, curtains and fixtures. Seal doorways with plastic sheeting to contain dust and fumes. Open all windows and position fans to create adequate air circulation—this prevents dust settling on wet lacquer and ensures proper drying. Turn off heating and air conditioning systems that might circulate dust throughout your home. Cover radiators, light fixtures and any remaining items with protective sheeting.
Sanding and Surface Preparation
The Sanding Process
Sanding is non-negotiable when learning how to lacquer a wood floor properly. Start with your orbital floor sander equipped with 60-grit sandpaper, working systematically across the floor in overlapping passes. Sand with the grain to avoid creating cross-grain marks that'll be visible under the lacquer finish. Progress to 100-grit sandpaper for the second pass, then finish with 150-grit for a smooth, receptive surface.
Pay particular attention to edges using your edge sander, maintaining consistent pressure to blend these areas with the main floor. Between each sanding stage, remove all dust thoroughly using your tack cloth, working systematically from one end of the room to the other.
Addressing Problem Areas
Inspect the sanded floor for defects. Fill any gaps or knots with wood filler matching your floor colour, sanding flush once dry. Replace any severely damaged boards. Ensure stains from water damage or pet accidents are addressed—some may require bleaching before lacquering.
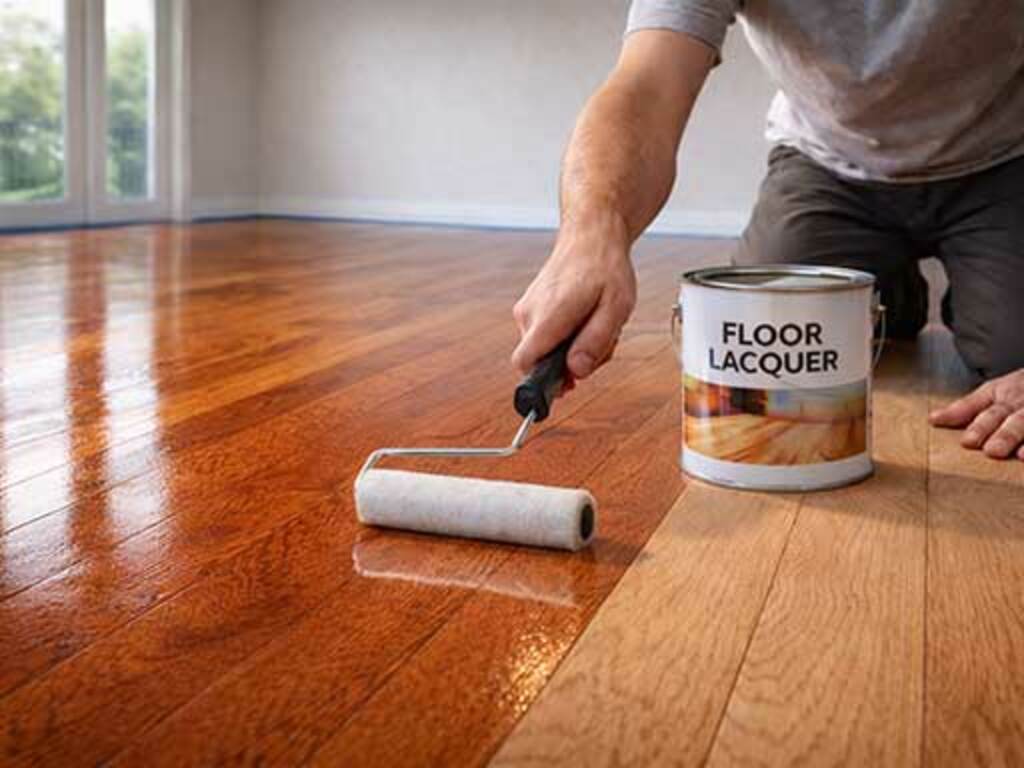
Lacquer Application Techniques
Choosing Your Lacquer Type
Blanchon offers excellent options for both solvent-based and water-based lacquers. Solvent-based products provide superior durability and depth but require excellent ventilation and longer drying times. Water-based lacquers, increasingly popular, offer faster drying, low odour and easier cleanup whilst still delivering impressive protection. Bona Hard Surface Floor Lacquer represents premium water-based technology, ideal for residential applications.
First Coat Application
Stir your chosen lacquer thoroughly—never shake, as this introduces air bubbles. Pour lacquer into your applicator tray. Using your foam roller or lambswool pad, apply the first coat in long, even strokes following the wood grain direction. Work in manageable sections, maintaining a wet edge to avoid overlapping marks. For edges and corners inaccessible to the roller, use your natural bristle brush, feathering the edges to blend seamlessly with roller-applied areas.
Apply only a thin, even coat—thick application causes drips, runs and uneven drying. Most professionals recommend applying lacquer at 18-21°C with 45-55% relative humidity for optimal results.
Drying and Sanding Between Coats
Allow adequate drying time between coats. Water-based lacquers typically require 4-6 hours, whilst solvent-based products may need 24 hours. Check manufacturer instructions for your specific product. Once thoroughly dry, lightly sand with 150-grit or 220-grit sandpaper to key the surface for the next coat. This creates a microscopic texture that improves adhesion. Remove all sanding dust meticulously before applying subsequent coats.
Additional Coat Application
Most floors require 2-3 lacquer coats for optimal protection. Apply subsequent coats using identical techniques, maintaining consistency in pressure, speed and coverage. Each coat builds protection and depth. The final coat requires the most care—any dust particles or imperfections will be visible in the finished surface, so maintain pristine conditions during application.
Professional Finishing Tips
Essential Techniques for Quality Results
- Maintain consistent roller pressure—varying pressure creates visible lap marks in the dried finish
- Never reload your applicator mid-section; work with sufficient product to complete logical zones
- Blend edges immediately; dried lacquer edges are difficult to disguise
- Inspect work regularly under different lighting angles to catch imperfections early
- Maintain room temperature and humidity—fluctuations cause uneven drying and finish defects
- Keep the applicator wet throughout application; pausing allows the product to begin drying on the applicator
- Always follow the grain direction; cross-grain application creates visible scratches
- Allow final coat to cure fully before allowing foot traffic—typically 72 hours minimum
Troubleshooting Common Issues
Dust nibs appear when particles settle on wet lacquer. Sand them smooth using 220-grit sandpaper after drying, then apply a spot touch-up if necessary. Bubbles form from vigorous stirring or applying over damp surfaces—prevent by gentle stirring and ensuring adequate substrate dryness. Uneven sheen may indicate inconsistent application pressure or inadequate coverage; apply additional thin coats to problematic areas. Peeling or flaking suggests inadequate surface preparation or poor adhesion—this requires complete refinishing.
Post-Application Care
After the lacquer fully cures, maintain your floor with regular dusting and gentle damp mopping. Use furniture pads under chair and table legs to prevent scratching. Place rugs in high-traffic areas. Avoid excessive water exposure and clean spills immediately. Regular maintenance preserves your lacquered finish for 5-7 years or longer, protecting your investment and maintaining that beautiful, glossy appearance. Learning how to lacquer a wood floor professionally ensures lasting protection and aesthetic beauty for your home.